Lemon-Garlic Cauliflower Rice (Paleo, AIP, Whole30)

I recently started working at Provision Kitchen, which I am loving for a host of many reasons. I won’t go in to how wonderful the restaurant itself is and what our philosophy is at Provision Kitchen (click on the link to learn more about the beautiful establishment), but I will talk about a few things I’ve learned there so far:

  1. More people love brussels sprouts than I ever realized. I love them too, but I always thought they were a more polarizing food.
  2. Same goes for mushrooms.
  3. There are so many ways to repurpose kitchen scraps–vegetable stock, for example.
  4. Wrist strength is a real thing that you can build.
  5. Segmenting an orange is tedious and delicate, but kind of fun.
  6. Elevating the base on which you build your entrée can elevate your entire dish.

Let’s talk about #6 because I’m sure it sounds like gibberish. At Provision Kitchen, you build your entrée with a base of your choice, a protein, and a number of fresh plant-based sides. Before I started working there, I never really considered adding a base to my meals. Some soupier or stewier meals called for a base, but nothing besides that.

But since working there, I’ve begun exploring ways to elevate my own bases at home. Beginning with cauliflower rice, for example. Cauli rice is just fine, but it’s not really something I get jazzed up about. It can be kind of blah. I wanted to find a way to elevate it but keep it simple or neutral enough to be able to go with a number of meals.

FullSizeRender-9

This recipe is simple, refreshing, and SO dang delicious. I’ve made it for several friends who have loved it; my recipe tester in Oregon really enjoyed it (she’d been looking for easy ways to make actually tasty cauli rice); and when I made it for my family, my brother requested that I make a double batch for him the next day. He’s since requested the recipe and makes it on a regular basis. You could definitely say this recipe is a crowd pleaser.

I’m going to think of more ways to elevate my bases, and I will post here as I successfully discover fun options. In the mean time, please let me know how you’re elevating your bases with the hashtag #elevateyourbase.

FullSizeRender-11

Lemon-Garlic Cauliflower Rice

  • Servings: 3-4
  • Difficulty: easy
  • Print

FullSizeRender-9

Ingredients:

12 oz riced cauliflower (I used a package of frozen riced cauliflower, no need to thaw)
1 tbsp olive oil
1/2 tsp sea salt
1/2 tsp garlic powder
Zest of 1 lemon
1/4 cup chopped parsley

Directions:

  1. Preheat oven to 425°F.
  2. On a sheet tray, toss together all ingredients except parsley.
  3. Place into oven for 15 minutes.
  4. Broil on high for 2 minutes or until lightly browned (keeping an eye on the cauliflower so it doesn’t burn).
  5. Remove from oven and carefully toss with 1/4 cup chopped parsley.
  6. Inhale, devour, enjoy immensely.

FullSizeRender-13


#elevateyourbase

Posted in AIP, Anecdotes, Autoimmune Protocol, Food, Healthy, Paleo, Recipes, Whole30 | Tagged , , , , , , , , , , , , , , , , , , , , , , , , , , , | Leave a comment

Broccoli Cheese Soup (AIP, Paleo, Whole30, Vegan)

FullSizeRender-5

Part of being on the autoimmune protocol involves assessing whether you are reacting to any foods on the protocol itself. Because your diet is already quite limited, it’s often not too difficult to realize what may be causing problems for you. But it is hard to accept because you feel like you’ve given up so much already and have to give up yet another thing. All of this to say…I begrudgingly had to accept that I’ve been reacting to coconut milk.

This is really difficult on the autoimmune protocol because coconut milk is our main source of creaminess. Coconut is in SO MANY recipes, so omitting coconut can become a real challenge for those of us who react to it. I’ve taken it upon myself to find other ways to impart richness and creaminess, and I’ll be damned if I can’t find a solid replacement so that I don’t miss coconut as much.

Broccoli cheese soup is so comforting and delicious. It has always been one of my favorites. I knew I wanted to create a broccoli cheese soup recipe, and I knew I needed to impart creaminess without said coconut milk. In comes our new star: CAULIFLOWER!

FullSizeRender-7

AIP “cheese” recipes often don’t taste like cheese at all, but I really think I nailed this one. It really does taste cheesy. It’s been approved by both of my parents (and my dad is a tough audience from whom to seek food approval–he’ll tell it to you straight), my dear friend/recipe tester in Oregon, and even a coworker who enjoyed some leftovers!

This soup is seriously so easy to make and comes together in a flash. Please try it and let me know what you think! I hope you love it as much as we do.

FullSizeRender-12

AIP Broccoli Cheese Soup

  • Servings: 4-6
  • Difficulty: easy
  • Print

FullSizeRender-12

Ingredients

-1 medium head of cauliflower
-1 cup roughly chopped carrots (approximately 2 small/medium-sized carrots)
-3 stalks broccoli
-1/2 small onion, chopped
-1/4 cup nutritional yeast
-2 cups bone broth or any chicken or vegetable broth, or water
-Juice of 1 lemon
-1/4 tsp garlic powder
-Olive oil
-Sea Salt (as directed below)
-Water

Directions:

  1. Break down cauliflower and wash, then put into a medium-sized soup pot with carrots. Add water until the pot is full to about an inch or so above the vegetables. Stir in a pinch of sea salt.
  2. Place pot onto the stove at medium-high heat. Once the water starts to boil, set a timer for 20 minutes. (Tip: Leave a wooden spoon in the pot, resting on the side of the pot, to keep the water from boiling over.)
  3. Meanwhile, preheat oven to 375°F.
  4. Cut broccoli into very small florets. It should amount to approximately 4 cups of broccoli. Toss the broccoli with 2 tbsp olive oil and a sprinkle of sea salt, then spread onto a greased baking sheet and roast in the oven for 10-12 minutes. When finished, set aside to cool.
  5. When the cauliflower and carrots are fork tender after boiling for 20 minutes (check to be sure and add more time if necessary), carefully drain the water from the pot.
  6. Carefully place the cauliflower and carrots into a blender. Add the broth, nutritional yeast, lemon juice, garlic powder, and 1/4 teaspoon sea salt. Blend until well-combined and velvety.
  7. Rinse the pot used earlier to boil the vegetables, then heat 1 tbsp olive oil in the pot and sauté the chopped onions until they begin to brown.
  8. Add the broccoli and stir to combine.
  9. Add the blended cauliflower mixture and stir to combine.
  10. Put a lid on top, and allow soup to cook on low heat for about 10 minutes to soften the broccoli and let the flavors build.
  11. Add more water to dilute the soup to your desired thickness. I added about 1 1/2 cups water at this time, but it depends on your taste (my mom added more because she likes a runnier soup).
  12. Pour into bowls and serve! Optional: squeeze a little lemon juice on top.
  13. Lick your bowl clean.

Note:
-This recipe comes together very quickly. I cut up the broccoli while the veggies were boiling, then put the broccoli into the oven when they were almost finished. While the broccoli was roasting, I blended the soup base. After that, I was almost done!

Posted in AIP, Autoimmune Protocol, Food, Healthy, Paleo, Recipes, Uncategorized | Tagged , , , , , , , , , , , , , , , , , , , , , , , , , , , , , | 9 Comments

Budget-Friendly Crock-Pot Chicken (Paleo, AIP, Whole30)

I’ve had many conversations with friends about how difficult it can be to eat well on a budget. It certainly can be, but it doesn’t always have to be. I love creating meals that are budget-friendly, healthy, and total flavor bombs. You’ll notice in my recipes that I never skimp on things that add or enhance flavor, and I’ll rarely include ingredients that are too expensive or difficult to find.

IMG_2624

This recipe is no exception! Chicken legs are incredibly cheap, and this recipe makes enough to eat all week. No oil, no broth, no BS. Just chicken, some things to add flavor, then set it and forget it (until 8 hours later). The bones release their own liquid, which is what the chicken cooks in to become flavorful and extremely tender. Bonus points for no shredding necessary because this chicken falls apart on its own.

IMG_2611

Budget-Friendly Crock-Pot Chicken

  • Servings: 4-6
  • Difficulty: easy
  • Print

IMG_2622

Ingredients:

12 chicken legs
10ish sprigs fresh thyme or rosemary
1 tsp sea salt
1 head garlic
1/2 large onion or 1 small onion (any kind)
Juice + zest of 1 lemon

Directions:

  1. Thinly slice the onion.
  2. Peel and smash each garlic clove.
  3. Place all ingredients into the crock pot, tossing to combine.
  4. Cook on low for 8 hours.
  5. When the chicken is done, carefully use tongs to pull out the bones (they will have already separated from the meat), tendon pieces, and twigs from the thyme/rosemary.
  6. Use the chicken to top salads, make flavorful chicken salad, eat on its own with some veggies on the side, snack on because it’s delicious, etc.

Notes:
-Zest the lemon before juicing; otherwise the lemon will become too flimsy to zest.
-Chicken will stay good for up to 5 days in the refrigerator (perfect for meal prepping at the beginning of the week).
-For storage, I recommend taking the chicken out and storing in a glass container with enough liquid from the slow cooker to cover the chicken so it doesn’t dry out.
-This recipe can easily be adapted to accommodate more or less. Use however many chicken legs you have!

FullSizeRender

Margo approves.

Posted in AIP, Autoimmune Protocol, Food, Healthy, Paleo, Recipes, Whole30 | Tagged , , , , , , , , , , , , , , , , , , , , , , , , , , , , , , , , , , , | Leave a comment

Dear Mom, You Don’t Have to Hide the Pills Anymore

A year ago this month, my psychiatric provider asked me whether I was experiencing thoughts of suicide, and I said yes.

In the months prior, I had been diagnosed with PTSD for the trauma I had experienced regarding health and the destruction of my body years earlier (as well as the ongoing trauma caused by the disease). I had never truly dealt with the emotions from the traumatic experiences, so treatment for PTSD triggered depression.

After studying depression and mental illness for years, I can honestly say that I never truly understood depression or appreciated its grip on a person until I experienced it myself. It wasn’t something I could snap out of; it wasn’t something I could heal with deep breaths or yoga or nature walks; it wasn’t a choice. I felt sluggish, incapable, unworthy, and unable to do anything about it. I felt everything and nothing. I felt heavy all the time. I felt stuck. I spent all of my spare time on the couch. When I begrudgingly went through the motions of my life, it was as if the air was thick and took more effort to travel through. And when I thought of all the things I could do to make myself feel better, I couldn’t do them.

That’s the thing about depression–it’s not a matter of what you will or won’t do to make yourself feel better; it’s a matter of what you can and cannot do. It’s not that I wouldn’t go on walks or meditate, it’s that I couldn’t.

When I started experiencing suicidal ideation, at first it was a little voice in the back of my mind. You have chronic health issues, every flare feels unbearable, it’s put you through hell and will likely do so again…there’s only one way to guarantee you won’t ever be sick again. Over time, it evolved from the quietest voice in my head to the loudest. I went from quietly entertaining it as an option to having frequent moments in which I actively felt like I didn’t want to be alive anymore. I was tired of fighting a losing battle, and I felt ready to wave my white flag of surrender.

During this time, I largely have my education to thank because I knew what to do, and I have my people to thank because they responded and helped protect me. I told all of my closest friends and immediate family about my suicidal thoughts, and I asked each of them to check in with me on a regular basis. I had dear friends around me that I could call or text when I needed, and they would open their doors to me when I couldn’t be alone. I talked to my therapist and psychiatric provider, and we developed a safety plan. I knew where the closest Emergency Room was if I needed it. When I truly felt at my lowest, I removed access to means for myself–I took all of the pills in my home that I could overdose on and dropped them off for a close friend to keep for me. This all sounds quick when it’s summarized up, but they were the most agonizing few months I’ve ever experienced. Expressing to the people who love you most that you don’t want to live and asking them to fight for you is unimaginably painful.

When I moved back home to Oklahoma from Nebraska, I picked up the pills from my friend and gave them to my mom to hide from me, as well as any medicine my parents had at home. Honestly, the only thing that kept me from suicidal attempts was the thought of one of my parents finding me. I could not fathom the pain it would cause them, so I kept most of my painful thoughts to myself and tried to distract myself from them. The problem is, you can’t really distract yourself from the loudest voice in your head, can you? My parents painfully watched while I continued to drag my feet around the house, unsure of my future and unable to build motivation to do anything about it. I was still in so much pain. Many days were filled with crying to friends or family that I didn’t feel worthy of living, that I didn’t see the purpose of continuing. In December, I had another serious surgery, this time on my neck. It was yet another time that the disease had threatened my life. Recovery was (and still is) long and painful. I felt like living a life like this wasn’t worth it.

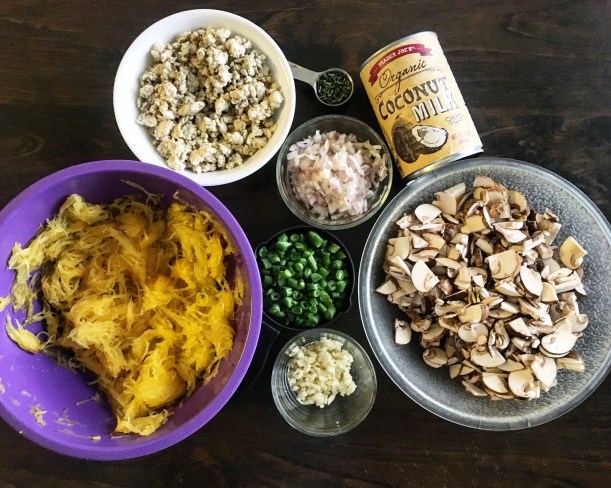
Last month, I started the autoimmune protocol (AIP). I didn’t force myself to start something to make myself feel better; I waited until I was ready. I waited until I was ABLE. I didn’t realize it at the time, but AIP was my way of taking back control over my life, physically and mentally. I had given myself time to heal, and now I could re-develop my sense of autonomy. I was finally doing something for myself. Through the protocol, I can see a future for myself, a life that isn’t full of suffering. It ignited my forgotten love for cooking, recipe development, connecting with like-minded individuals. It gave me my confidence back. My real confidence, not the confidence mask I put on in public for so long.

I don’t even know when it happened, exactly. But about a week and a half ago, I stumbled upon the pills my mom had hidden from me. And for the first time in a year, I felt nothing. They were just pills. They weren’t a means to achieve peace.

I realized that I was not suicidal anymore.

________________________________________________________

This is not meant to paint a pretty picture of how I got my life back together. I’m still not back together. But I don’t think I’m falling apart anymore. And I can’t stress enough that I waited until I was ready. I wouldn’t have been able to do anything about it before then. I will have more posts in the future expanding on my experience with depression and suicidal ideation, but when I’m ready to write about them. I felt this post in my heart, and I knew I had to write it.

________________________________________________________

Do you know someone who you fear may be experiencing suicidal thoughts or feelings? Please, don’t ignore the feeling, and don’t be afraid to speak up about it. You can save someone’s life by speaking up to them. The words feel scary and wrong coming out of your mouth, but they need to be said.

Are you experiencing suicidal thoughts or feelings? Please reach out to someone, anyone. You are not alone. You can text GO to 741741 to chat with a crisis counselor 24 hours a day, 7 days a week, or call the National Suicide Prevention Lifeline at 1-800-273-8255, available 24/7 as well. Alternatively, you can go straight to your nearest Emergency Room.

Posted in AIP, Anecdotes, Autoimmune Protocol, Healthy, Hidradenitis Suppurativa, mental health, Paleo, Uncategorized | Tagged , , , , , , , , , , , , , , , , , , , , , , , , , , | 1 Comment

Chimichurri (Paleo, AIP, Whole30)

Do you ever have one of those unexpected moments in which someone from your past walks back into your life at the perfect time? My best friend from elementary school recently reached out to me after reading my blog, and we reconnected through all things autoimmune- and AIP-related. We Facetimed about a week ago, which was the first time I had spoken to her face-to-face in almost 20 years. We decided to support each other and share our AIP struggles, meals, thoughts, etc. It’s only been a week, and she has already made my life so much better by joining my support system and allowing me to become part of hers.

THIS is why it’s so important for me to share my story. Not because it makes me feel good for people to know my most personal, private challenges; on the contrary, it makes me feel incredibly anxious to share my story. But because of the people it has brought into my life or brought back into my life and the connections we’ve made. It means so much to me when people, be them friends or strangers, reach out and open up about their own adversities. These people are why I will continue to share my story and try to be vulnerable. Hopefully it will create a safe space for others to feel comfortable sharing their own vulnerability as well.

Now, moving on to the real reason you’re here…CHIMICHURRI!

Not just any chimichurri, but AIP chimichurri. This stuff is insanely good. I found myself dipping chicken and vegetables in it all week, tossing veggies in it before roasting or grilling, etc etc. I’ll include a few serving suggestions after the recipe, so keep scrolling if you wish!

IMG_2704

Chimichurri

  • Servings: 8-10
  • Difficulty: easy
  • Print

IMG_2704

Ingredients:

1/4 white onion, chopped
1 cup cilantro
1 cup parsley
2 tbsp fresh oregano
4 garlic cloves
2 tbsp red wine vinegar
1 tsp lime zest
Juice of 1 lime
1/2 tsp sea salt
1/2 cup olive oil

Directions:

  1. Add all ingredients to blender.
  2. Blend until smooth, scraping the sides down as necessary.
  3. Refrigerate for 1 hour, minimum, to allow flavor to develop.

Notes:
-Zest the lime before you juice it. If you juice first, it may become too flimsy to zest.
-This tastes even better the next day, so you can make it the day before use!
-This will last for about a week in the fridge.

Serving Suggestions:

IMG_2705

Drizzle over grilled carrots (or any grilled/roasted veggie).


IMG_2707

Pour over grilled chicken (or serve as a dipping sauce). Also fantastic with steak or shrimp.


IMG_2739.JPG

Slice zucchini lengthwise, rub with chimichurri, then grill. This can be done with just about any veggie and applies to roasting too. I roasted cauliflower that I had tossed in the chimichurri and it was dreamy as well.

However you eat the chimichurri, I hope you enjoy it!

Posted in AIP, Autoimmune Protocol, Food, Healthy, Paleo, Recipes, Whole30 | Tagged , , , , , , , , , , , , , , , , , , , , , , , | 1 Comment

Baked Sweet Potatoes with Slow Cooker Carnitas and Lazy Guacamole (Paleo, AIP, Whole30)

It can be difficult to maintain a social life while on the autoimmune protocol. My friend Kelsi started a conversation on her Instagram post last night that reflected one of the major struggles many of us face who are on restrictive or healing diets.

She asked, “Have you had someone choose not to eat something in front of you they knew you couldn’t have?

My response was, “YES! And While I appreciate the thought behind the gesture, I always tell people that I’d rather them eat whatever they want or can. I remind them that I am making a choice to restrict certain foods based on my own needs, but I want them to feel comfortable eating whatever they want with me! Company > cuisine.

That being said, it is always nice to be able to sit down with someone and know that we are sharing a culinary experience. The easiest way to guarantee this for me is to cook for people. No one ever says no to someone else cooking for them (in my experience, at least). In fact, I’ve found that my friends and family enjoy it–not only because they don’t have to cook, but because they get a peek into what I eat on the daily. And I enjoy it because I get to share a piece of my life (and passion for cooking) with them. Win-win!

FullSizeRender-3

I made this meal for a friend recently, then made it again for my mom the next day. It received rave reviews from both, and bonus: my mom and I were able to throw the leftover carnitas into everything the following week. My mom, who isn’t usually a huge fan of pork, kept requesting “that crispy, crunchy pork” all week.

I adapted the carnitas recipe from Juli at PaleOMG to make it in the crock-pot (she makes hers in the Instant Pot) and to make it AIP-compliant. Instead of sticking them under the broiler at the end like Juli recommends, I stored mine in a container in the fridge and crisped up however much I wanted to use on a skillet before serving.

This recipe also features the easiest way to get a perfectly baked, caramel-y, melty sweet potato. I’ve tried other methods, but I keep coming back to this one. It could be because it’s fool-proof and delicious, but it’s probably because it’s the easiest and I’m lazy. But seriously, check the above photo. Do you see how the sweet potato is glistening? That’s caramelization, folks. Sticky, sweet caramelization. So good.

FullSizeRender-2

Baked Sweet Potatoes with Slow Cooker Carnitas and Lazy Guacamole

  • Servings: 2
  • Difficulty: easy
  • Print

FullSizeRender-3

Ingredients:

-2-3 lbs pork shoulder or butt
-2 tsp sea salt
-2 tsp dried oregano
-1 white onion, chopped
-4-5 garlic cloves, minced
-2-3 bay leaves
-Juice of 1 lime
-1 1/2 cups orange juice
-1 cup chicken broth, bone broth, or water
-1 tbsp olive oil

-2 medium sweet potatoes
-1 avocado
-Juice of 1/4 lime
-1/2 tsp garlic powder
-Sea salt, to taste
-1/4 cup minced red onion
-1/4 cup cilantro

Directions:

  1. Carnitas:
    • Combine the first 9 ingredients (pork shoulder through chicken broth) in a slow cooker, taking care to make sure that the fat cap on the pork is facing up. Cook on low for 9 hours.
    • Once 9 hours have passed, carefully lift the lid off the slow cooker and break apart the meat with a fork. It should fall apart easily. Additionally, remove the bay leaves from the slow cooker. At this point, you can transfer the pork into a container and, after it has cooled, store it in the fridge until you’re ready to use it. If doing so, only reserve enough liquid from the crock pot to cover the pork in the container; discard the rest of the liquid. 
    • When ready to serve, heat 1 tbsp of olive oil in a skillet (preferably cast iron) on medium-high heat. Add 1/2 cup shredded meat per person and distribute evenly throughout the skillet. Leave undisturbed and allow the meat to crisp up on bottom.
    • After a few minutes, sauté the meat to redistribute, then allow to crisp up again. Do this until most of the meat has browned and is crispy.
  2. Sweet Potatoes
    • Preheat oven to 450ºF.
    • Wash and dry sweet potatoes. Individually wrap each one in foil, then place into oven for 1 hour.
  3. Assembly
    • Carefully cut open the sweet potatoes, gently smashing it down a little bit to create room for crispy carnitas goodness.
    • To make the lazy guacamole, scoop the flesh out of the avocado and add in lime juice, garlic powder, and sea salt. Mash to combine.
    • Top sweet potatoes with crispy carnitas, a generous scoop of guacamole, minced red onion, and cilantro.
  4. DEVOUR.

Notes:
-You could easily cook the carnitas and sweet potatoes ahead of time, them just reheat and assemble when you’re ready to eat.
-What to do with leftover carnitas? Crisp them up whenever you want to eat them, then use to top soups, salads, hashes, or even eat alongside some roasted or sautéed veggies for a delicious meal. They are incredibly versatile!
-If making this for more than 2 people, then just add in extra sweet potatoes, 1/2 cup of carnitas per person, and 1/2 avocado per person (adjusting guacamole ingredients as necessary).

FullSizeRender

The textural contrast of the creamy sweet potato and guacamole with the crispy carnitas and crunchy red onions, plus the temperature contrast of warm sweet potato and carnitas with cool guacamole…I cannot. This meal has so much going for it. I hope you make it and enjoy as much as we have!

Posted in AIP, Autoimmune Protocol, Food, Healthy, Hidradenitis Suppurativa, Paleo, Recipes, Uncategorized, Whole30 | Tagged , , , , , , , , , , , , , , , , , , , , , , , , , , , , , , , , , , , , , | 4 Comments

Chicken Green Bean Casserole (Paleo, AIP)

I started the autoimmune protocol recently, and I’ve realized that for me the biggest challenge is convenience. Cooking for yourself for breakfast, lunch, and dinner every day is NOT convenient. It’s exhausting. I initially found myself skipping meals just because I didn’t feel up to cooking three times a day.

In comes this casserole! I found Laura’s Tuna No-Noodle Casserole, and in an effort to adjust the recipe to my tastes and to make it AIP-friendly, this casserole was born.

IMG_2478

I think of making this dish as breaking it up into five easy phases:

  1. Prep the spaghetti squash, then set aside.
  2. Cook the ground chicken with some seasonings, then set aside.
  3. Make the cream of mushroom soup, simmer it, then mix in the chicken and squash.
  4. Bake it with crushed plantain chips on top.
  5. DEVOUR.

This recipe will keep for about five days in the fridge, and it reheats beautifully. It’s a perfect casserole to make ahead, then eat throughout the week. I found myself reaching for this dish at lunchtime. Breakfast and dinner I can do, but I want a convenient lunch! This veggie-packed recipe fits the bill, and the coconut milk makes it satisfying and insanely filling (but the garlic and rosemary overpower the coconut flavor, so you can’t taste it).

Here we go!

img_2473.jpg

Chicken Green Bean Casserole

  • Servings: 4-6
  • Difficulty: easy
  • Print

IMG_2477

Ingredients:

1 medium spaghetti squash
1 tbsp olive oil

1 tsp olive oil
3/4 lb ground chicken (I made 1 lb, then set aside about a quarter of it to use for later)
1/4 tsp ground sage
1/2 tsp dried thyme
1/4 tsp garlic powder
1/2 tsp sea salt

1 tbsp olive oil
2 shallots, minced
8 oz baby portabella mushrooms, chopped
1 cup diced green beans
1 can full-fat coconut milk
4 cloves garlic, minced
1 tbsp finely chopped fresh Rosemary
sea salt, to taste

1/2 cup plantain chips
1/4 tsp garlic powder
1/2 tsp dried parsley

Directions:
1. Preheat oven to 400ºF.
2. Using a sharp knife, cut the spaghetti squash in half, lengthwise. Scrape the seeds out, then divide the tablespoon of olive oil between the two halves and rub it into the flesh. Place the squash halves cut side-down onto a foil or parchment paper-lined cookie sheet, then insert into the oven for 35 minutes.
3. Using a fork, scrape the squash out. It should easily come out in spaghetti-like strands. If it does not, then put it back into the oven for 5-10 minutes, until it is soft enough to scrape out easily. Scrape out all of the squash, then set aside.
4. While the spaghetti squash is in the oven, start this process: sauté the ground chicken, sage, thyme, garlic powder, and sea salt in the teaspoon of olive oil until the chicken is cooked through, breaking it up while sautéing and making sure the seasonings are evenly incorporated. Set aside.
5. On medium heat, add the tablespoon of olive oil to the pan, then add the shallots and sauté until soft and translucent, about 3 minutes. Add the mushrooms, green beans, garlic, and rosemary. Sauté until the mushrooms begin to soften and the garlic and rosemary are fragrant, about 2-3 minutes (your kitchen should be smelling amazing right about now!!).
6. Pour in the coconut milk, increase heat to medium-high, and allow mixture to come to a boil. Turn the heat down to low and let it simmer for about 10 minutes, which allows the flavors to build.
7. Add the ground chicken and spaghetti squash, stir to incorporate well, and then salt to taste.
8. Pour the mixture into a casserole dish.
9. Combine plantain chips, garlic powder, and dried parsley in a ziploc bag. Use a rolling pin (or just a pot/pan, whatever works!) to gently crush the plantain chips. You don’t want them to become a fine powder, just crushed enough to form a bit of a crust.
10. Evenly spread the plantain chips over the mixture in the casserole dish.
11. Put into the oven and broil on high until the plantain chips are browned. Keep an eye on this because it will go from perfectly toasted to burnt very quickly! It should only take a minute or two.
12. Serve. Enjoy. DEVOUR.

Notes:
-You can easily do steps 1-8 ahead of time, and then just add the plantain chips on top and toast them when you want to serve the dish. If doing this, I recommend preheating the oven to 350ºF and allowing the casserole to heat for 15-20 minutes, then adding the crushed plantain chips and broiling.
-This recipe reheats very well. Feel free to add more plantain chips on top after you reheat for added crunchy pleasure!
-This will keep for 4-5 days in the fridge. We ate this all week and enjoyed every bite.

IMG_2479

While I wouldn’t share the combined casserole with my little canine, I did give her a few bites of spaghetti squash, which she loved. 


Posted in AIP, Food, Healthy, Hidradenitis Suppurativa, Paleo, Recipes | Tagged , , , , , , , , , , , , , , , , , , , , , | Leave a comment

Fighting for Your Life Physically vs. Fighting Mentally/Emotionally

Years ago, when my health was deteriorating at an alarmingly rapid rate, I expressed to my mom that I didn’t want to be alive anymore. The physical torture was so immense and unbearable that I could not imagine living that life long-term. If that was all there was to life, I wanted to throw in the towel.

When, after what felt like rock bottom, my family and I fought so unbelievably hard to preserve my own life, I told myself that every day, every moment moving forward would be treasured and used wisely. I would never waste a moment of my precious life, of this new lease I had been given on life. More notably, I genuinely believed that because I had fought so hard to be alive, I would never again wish I were dead.

It wasn’t until years later that I learned how naive that sentiment could be.

It just so happens that fighting for your life physically and fighting for your life mentally and emotionally are completely different.

When I physically fought to live, it was all about survival. Everything in my brain and body pushed me toward life. There did not seem to be any other options. At times, it felt like my personality had shut off and my survival instincts just took over. I felt like a shell of a human being, and I was trying hard to preserve what was inside the shell.

Dealing with depression, however, feels like the shell is irreparably shattered and the contents are overflowing, spilling out too quickly to control. The problem is, you no longer have the will to repair the shell or the contents inside. And even if you do have the will, you simply don’t feel capable of doing anything about it. So the contents continue spilling out of your shell until you feel empty. When fighting mentally and emotionally to survive, to want to survive, everything in my brain and body has pushed me toward death. 

After spending the better part of a decade fighting for my life, I ran out of energy. Each new problem presented as another obstacle I didn’t have the energy to overcome. Each day felt impossible to get through. Seeing my own pain reflected in the eyes of those I love with each new health flare made me wish I could stop being a constant source of pain for the people around me. The only real solution and escape from this perpetual cycle felt like it had to be death.

I thought that because I viewed life as precious, I would not be susceptible to thoughts of suicide. I thought that suicide was about actively wanting to die, but I learned that, for me, it was about not wanting to be alive anymore.

Screen Shot 2017-11-07 at 6.20.39 PM

If any of this resonates with you, if you can relate to how I have felt, then I want you to know that there are resources out there that can help. Click here, or call the National Suicide Prevention Lifeline at 1-800-273-8255.

If you can’t do that right now, it’s okay. I know how hard it can be to reach out when you feel so tired of living, tired of everything. Depression has been one of the most difficult and painful things I’ve encountered in my life, and you don’t have to suffer in silence. If you are feeling the way I have felt, then I want you to know that I am a safe space. I love you, and I understand what you are going through. Please reach out to me or someone you love, and you won’t have to do this alone.

Posted in Healthy, Hidradenitis Suppurativa, mental health, Uncategorized | Tagged , , , , , , , , , | Leave a comment

To the Person Who Didn’t Believe in Me

I’m going to be honest. This post is a difficult one for me. It is something I have wanted to share for quite a while, but I allowed myself time to develop the courage to share this. It’s extremely personal for me, but I hope that it can give at least one person hope.

Four years ago, I wrote this blog post.

Screen Shot 2016-08-06 at 12.40.25 AM

My parents and me at graduation, something we once lost hope would ever happen. It was one of the happiest days of my life.

1546281_10155422657030368_2049842029072132534_n

The day I accepted my offer at UNL. Celebrating with a close friend.

After I wrote that post, I wasn’t really sure where my life would go. I planned on going back to school the following Fall and graduating as soon as possible (I seriously just wanted to be done with school). But something beautiful happened. When I went back to school, I discovered a supportive environment full of faculty and students who believed in me. Soon, I developed plans of going to graduate school. Grad school turned into dreams of getting my Ph.D.

I promised myself that, when I got into a doctoral program, I would write a letter to the faculty member mentioned in the previous blog post. Approximately a year and a half ago, after accepting my offer into the School Psychology program at UNL, I came through on that promise.

I’m honestly not sure whether she ever received the letter. I think about it sometimes, but I quietly take solace in the act of writing and sending the letter. The act of standing up for myself. The act of standing up for others who have felt defeated by someone who didn’t believe in them.

Here is the letter I wrote:

Dear Dr. __________,

I hope this letter finds you well. You may not remember me, but I sat across from you in your office in Fall 2011, requesting my third complete medical withdrawal from my courses at the University of Oklahoma. I had been struggling with my health for years, as evidenced by the inches-thick binder of medical records that accompanied me during our meeting. You recommended that I do some soul-searching and suggested that I discontinue my college education. After I told you that I planned on going to graduate school, you glanced at my grades and the number of W’s on my transcript and said that I would never get into professional school with such a poor history. You told me that I would need to look into other options if I could not get my health under control. I left your office feeling hurt, defeated, and hopeless. I almost believed you.

The following semester, my health deteriorated further. I withdrew from my courses a fourth time. I became so sick that I was completely disabled. I required two major surgeries, coupled with months of rehabilitation and healing. By August 2012, however, I was back in school. I chose to attend a different university because I could not imagine being in a place that harbored so many negative memories for me. I maintained good grades, found ways to help my department, and graduated within a year and a half. With the encouragement of the faculty at my university, I started a masters program. This spring, I accepted an offer into the School Psychology Ph.D. program at the University of Nebraska-Lincoln. In three short years, I turned my life around. And I have you to thank for that.

I think about our conversation every day. Your words almost broke me. If it had not been for my impossibly strong support system, they would have. While your words added fuel to my fire, they have the power to extinguish that of others. As [a leader at the university], you have the potential to ruin a student’s career by passing judgment at an inopportune moment. Students believe what you have to say. I urge you to think about the impact your advice can have on a student before giving it, to consider how it may affect his or her life. I imagine students come to you when they are already broken—I was. I urge you to encourage them, to help them mend their broken pieces instead of breaking them further. To understand that, as a faculty member at a prestigious university, discouraging a student from pursuing an education that he or she so badly wants can hinder potential greatness. I urge you to think carefully about the lasting impression you can leave on students; I know you have left one on me.

Sincerely,

Pooja Parikh


Posted in Anecdotes, Hidradenitis Suppurativa, Misc, Uncategorized | 3 Comments

How to: the Perfect Smoothie

Smoothies are a huge part of my life (seriously, ask any of my friends). As a graduate student, there is nothing better than a meal I can throw into a blender and then slurp down as I run out the door to work or class. Bonus points because it’s good for me and keeps me full and energized for a long time.

I’m actually pretty picky about my smoothies, which is why I rarely buy a smoothie and prefer to make them myself. I think I’m allowed to be picky though because my smoothies are pretty delicious (not to toot my own horn). And there’s something to be said for knowing all of the ingredients I’m putting into my body!

So, while I usually mix up what exactly I’m putting into my perfect smoothie (mix up–get it?), there are a few things that I incorporate into the base of every smoothie (more or less) to ensure that my smoothie has optimal taste, consistency, and nutritional value.

Screen Shot 2016-07-24 at 2.55.24 PM

Tips:

  1. Always add greens. To me, a smoothie without at least 2-3 packed cups of leafy greens (spinach, kale, collards, etc) is a wasted opportunity to incorporate greens. You cannot taste them (especially spinach–I promise it’s undetectable) and you get an extra dose of fiber, which will keep you full longer. Also, pro-tip: if you have a crappy blender like I do, pulse the greens with whatever liquid of your choice first until it liquifies, then add everything else. It’ll blend together much more easily, and your blender won’t have to work as hard! Also, using less liquid overall will lead to a thicker smoothie, which means you’ll basically be living the dream.
  2. Only use frozen fruit. I exclusively use frozen fruit in my smoothies–that way I never have to add ice! No ice = no watered down smoothie. Win/win. I also like to buy fresh fruit super cheap when it’s in season and freeze it in Ziploc bags.
  3. Add 1/2 – 1 frozen banana. It makes the base extremely creamy, which is great when you aren’t adding dairy to a smoothie (if you don’t like the taste of banana, see #4). I always buy a bunch of bananas, let them sit out for a couple of days to ripen, then peel –> smash –> freeze in individual Ziplocs. It may seem wasteful to put each banana in its own Ziploc, but it helps me portion better AND I reuse the Ziplocs so I feel better about it (I keep all my banana Ziplocs in a grocery bag in the freezer for easy organization). 
  4. Add 1/4 – 1/2 avocado + honey. Adding avocado to your smoothie not only gives you a punch of healthy fats which will also keep you full longer, but it makes the smoothie very creamy as well (good alternative if you don’t like bananas). Be sure to add a bit of honey (not too much–maybe a teaspoon or 1/2 tablespoon) or other sweetener if you add avocado because it has a noticeably savory flavor.
  5. Add protein. Smoothies are a meal replacement option for me, so I try to make sure I have all my bases covered. Protein will keep you full too! I prefer to add 2 tbsp of collagen to my smoothies, which has 11g protein, but you can add whatever you want!
  6. Liquid. I mix it up with my liquids. Sometimes I use coconut water, sometimes coconut milk. The coconut water helps with hydration and does not contribute a taste to the smoothie, and the coconut milk adds healthy fat, although it tastes coconutty. You could also use water, almond milk, anything! I’ve even left an opened can of LaCroix in the fridge and used that as my liquid base (amazing). I don’t recommend using fruit juice because it will increase the sugar content of your smoothie without really providing any nutritional value. 
  7. Lemon zest. This doesn’t necessarily go with every smoothie, but a pinch of lemon zest really brightens up a smoothie and makes it taste fresh. If you haven’t done this before, I highly recommend it!

So, there you have it. My main smoothie tips that lead me to making the perfect smoothie every single day. I will have another post soon in which I provide ingredient combination suggestions I like to use in my smoothies to hope give you more inspiration.

In the meantime, what are some tips you have to make the perfect smoothie that are not mentioned here?

Posted in Food, Healthy, How To, Paleo, Uncategorized | Leave a comment