Unlocking & Reliving Trauma

Warning: this post has graphic descriptions and imagery of surgical procedures and wounds.

Eight years ago, I had one of the most traumatic experiences of my life and my health journey.

One of the surgeries I desperately needed at the time was on both of my upper thighs. They were ravaged by infection at this point, and I went into the surgery completely unsure what to expect. I can tell you that I certainly did not expect what would transpire after the surgeries, which is 4 separate and intense traumatic experiences that have been burned into my memory.

Trauma #1
Due to the nature of the surgery and how deep they were planning to cut into my thighs, the anesthesiologist suggested an epidural combined with the general anesthesia, hoping it might ease the burden of pain on my body some. But when I woke up after surgery and for days later, I was unable to move my legs. A nurse would pick up my leg or bend it, but as soon as she let go my leg would flop back down to the bed. I had feeling in my legs, but I could not control them, no matter how hard I tried. This would be devastating to anyone, of course, but to add another layer to it–I had just run my first full marathon a year before then. I was genuinely picturing what my life would look like in a wheelchair moving forward.

Fortunately, the physical therapist was able to work with my legs to restore muscle memory; and within a few days I was able to independently move my legs again. But I will never forget the fear, feeling frozen in time, picturing the worst because I had zero distractions from the pain and horror.

Trauma #2
The first time they tried to get me to walk after the surgery. It took 4 nurses + a walker to realize that I was NOT ready to be walking. We made it a few steps before turning me back to the bed because my body was shaking so violently from the pain. We did not try again for a full week because it was clear that we had tried far too early. Coincidentally, this experience was exactly a year to the day from when I had run my first marathon. That juxtaposition was almost too much to bear. I allowed myself to cry and feel defeated, but I developed firm resolve in knowing that by that time, the following year, I would run another full marathon (spoiler alert: I ran one less than a year later).

Trauma #3
The next day, I vomited in the middle of the night, and we noticed that my right leg was bright red and swollen all the way down to my knee. My fever confirmed what we had feared–that the surgical wound had become infected. My pain went through the roof at that point, and I couldn’t even sit up for more than a few minutes because the pain was too intense. What became significantly traumatic about this scenario is that the infection caused my surgical incision to open back up. It was a deep incision made along the crease between my thigh and groin, and it made walking (when I was finally able to do so with 2-3 nurses in assistance) excruciating.

I remember a specific moment when the nurses helped me to the bathroom and I caught a glimpse of myself in the mirror. I did not recognize the person who looked back at me. Pale skin, sunken in cheeks, dark circles, thinning hair, a shadow of the person I was used to seeing when I looked in the mirror. It didn’t even feel like I was looking at a human. There was a complete disconnect between me and the person looking back at me. And then…I saw it. I saw the open wound at my thigh. Only for a moment, but it is forever etched into my memory–what the inside of my body looked like. I will never forget the dissociative horror of that moment and still feel it in my gut when I think about it.

Trauma #4
Because of the infection and subsequent wound opening, my doctor decided to utilize a wound vacuum to aid in my healing. For those of you who aren’t familiar, a wound vac is a machine used to help eliminate infection or fluid buildup in surgical wounds. On one side, there is a sponge that is applied to the open wound. A dressing is applied over the sponge, and a tube is attached to it, with the actual machine on the other end. When you turn on the machine, the suction causes the sponge to contract, safely closing the surgical wound while suctioning any fluid build-up as the wound heals. I got to carry this wound vac around with me for 4-6 weeks after I was discharged from the hospital, until my wound healed. It was painful and inconvenient…to say the very, very least. But it was necessary.

Now that you have a small picture of the trauma that occurred after this surgery, let me tell you…for the first time since then, I have a surgery scheduled for the same right leg that brought upon so much trauma 8 years ago.

Fortunately, this surgery will not be anywhere near as involved or serious as the previous one, but explain that to my anxiety, will you? Because this heavy feeling of all the past trauma being unlocked is like an elephant sitting on my chest. It’s making me realize that I never fully processed the trauma of those months, and it’s making me feel desperate for relief.

So what am I doing about it?

FullSizeRender.jpeg

I contacted a therapist, and I set up my first appointment with her. I don’t expect healing to occur overnight by any means, but there is comfort in knowing that I am doing what I can to heal emotionally while I have such support for physical healing. I wouldn’t be me if I didn’t set up every protective factor I could to save me when I know I’ll need it.

Posted in Anecdotes, Hidradenitis Suppurativa, mental health | Tagged , , , , , , , , , , , , , , , , , , , , , , , , | 1 Comment

Herb & Garlic Roasted Pecans (Paleo, Whole30, Vegan)

pecans from top

Herb & Garlic Roasted Pecans

  • Servings: 10-12
  • Difficulty: easy
  • Print

FullSizeRender 2

Ingredients:

3 cups raw pecan halves
2 TB finely chopped fresh herbs*
2 TB olive oil
3/4 tsp garlic powder
1 tsp sea salt

Directions:

  1. Preheat oven to 350°F.
  2. In a medium-sized bowl, combine all ingredients. Use your hands to mix well and ensure that pecans are evenly coated.
  3. Spread onto a parchment or silicone mat-lined baking sheet in a single layer. You don’t have to be too picky here; just make sure they’re spread out.
  4. Carefully place into the oven for 8 minutes.
  5. Remove from the oven and use a wooden spoon or spatula to mix the pecans.
  6. Place back into the oven for another 7 minutes.
  7. Remove, allow to cool completely, and store in an airtight container for up to 7 days at room temperature.
  8. Enjoy! Use as a yummy garnish to balance salads, soups, stews, whole or chopped; grind and use to bread chicken or fish; or use as an emergency snack.

Notes:
-I used a combination of Rosemary and thyme, but use whatever you have on hand. Dill, chives, tarragon, or mint would be fantastic here too!

Posted in Food, gluten free, Healthy, Paleo, Recipes, vegan, Whole30 | Tagged , , , , , , , , , , , , , , , , , , , , , , , , , , , , , , , | Leave a comment

Nightshade-Free Egg Bhurji with Crispy Sweet Potato Cakes (Paleo, Whole30)

When I had to give up nightshades almost 8 years ago, I was so devastated because I felt like I couldn’t eat any of the foods I grew up eating. In came my sweet mom, who has helped me think outside the box and find replacements for foods I thought I’d never be able to eat again. I’ll start sharing some of our swaps and recipes so YOU can enjoy them too. First up: Nightshade-free Egg Bhurji!

Our take on the classic Egg Bhurji recipe to make it nightshade-free! There ARE substitutions listed in the notes if you can have nightshades and want to use them instead.

When we were playing with this recipe, my mom was skeptical about the use of pumpkin puree and lemon juice, but she was shocked at how authentic it tasted. You honestly cannot tell that it has pumpkin instead of tomato–but you won’t believe it until you try it yourself.

FullSizeRender-1.jpeg

Egg Bhurji with Sweet Potato Cakes

  • Servings: 2
  • Difficulty: easy
  • Print

FullSizeRender.jpeg

Ingredients:

Egg Bhurji:
1-2 TB oil of choice
4 cloves (or 1/4 tsp ground cloves)
1 cup onions, chopped
1/2 inch ginger, grated
1 clove garlic, minced
1/4 tsp turmeric powder
1/4 tsp cinnamon
1/2 tsp ground cumin
1/2 tsp ground coriander
3 TB pumpkin puree
1 tsp lemon juice
1/2 tsp salt
1/2 tsp black pepper
Optional: 1 cup chopped spinach
4 eggs
Cilantro for garnish, if desired

Sweet Potato Cakes
1 1/2 cups grated sweet potato
1/2 tsp salt
1/4 tsp black pepper
1/4 cup avocado oil

Directions:

  1. Get all your ingredients ready to go in separate bowls because things move rather quickly:
    • Combine cloves & chopped onion (unless using ground cloves, then the seasoning will go in with the rest of the spices).
    • Combine garlic & ginger.
    • Combine all spices (including salt & pepper).
    • Combine pumpkin puree & lemon juice.
    • Crack eggs into a bowl & whisk.
    • Add grated sweet potatoes to a bowl and use your hands to mix with the salt & pepper.
  2. Heat a medium-sized pot on a stovetop on medium heat. Add 1-2 TB avocado oil and allow to heat for 15-30 seconds, then add onions and cloves. Allow onions to cook for approximately 8-10 minutes, stirring occasionally but allowing to brown.
  3. Meanwhile, in a separate pan, heat 1/4 cup avocado oil for about 1 minute (you know it’s hot enough when you flick a little bit of water into the oil and it sizzles). Form approximate sweet potato patties of desired size, and carefully place into the pan. Use a spatula to gently smash the patties down. You’ll likely be able to fit 2-3 patties into the pan at a time.
  4. Allow patties to cook for 2-4 minutes, or until you can see that they are browning on one side. Then, carefully flip and cook on the other side for another 2 minutes or until browned. Transfer to a paper towel-lined plate and repeat with the rest of the grated sweet potato.
  5. After onions are browned, turn heat to low and add garlic & ginger. Sauté until fragrant, 1 minute.
  6. Add spices to the mix and continue to sauté for 1 minute.
  7. Add spinach and sauté until wilted, approximately 1 minute.
  8. Add pumpkin puree and lemon juice and mix to combine well until heated through, about 1 minute.
  9. Add whisked eggs and stir to combine, continue stirring until eggs reach your desired consistency, probably 2-3 minutes or so.
  10. Place sweet potato cake on a plate, top with eggs, sprinkle with cilantro, and dig in! Be sure to avoid the whole cloves if you use them, or remove before you serve. Enjoy!

Notes:
-Instead of the spices, you can use garam masala! Replace all spices (except salt and pepper) with 1 1/2 tsp garam masala.
-You can also replace the pumpkin + lemon juice with 3 TB tomato paste, but if using tomato paste make sure you don’t add lemon juice because it is acidic enough on its own.
-Use regular potatoes in place of sweet potatoes if you want, or even toast instead!
-Feel free to add cayenne or any other form of heat.
-You can also add any other veggies you have on hand–add them in place of the spinach and sauté until cooked through.
-You can make a large batch of the pumpkin mixture and then use a bit of it to make scrambled eggs throughout the week. Easy breakfast prep! Keeps well in the fridge on its own for up to 7 days.
-You can also make extra with the eggs and reheat throughout the week. Keeps well in the fridge for up to 5 days.

Posted in Food, gluten free, Healthy, Paleo, Recipes, Uncategorized, Whole30 | Tagged , , , , , , , , , , , , , , , , , , , , , , , , , , | Leave a comment

Cinnamon Sugar Cookie Pecan Butter (Paleo, Vegan)

IMG_2055

Cinnamon Sugar Cookie Pecan Butter

  • Servings: 6-8
  • Difficulty: easy
  • Print

IMG_2058

Ingredients:

2 cups raw, unsalted pecans
1/4 tsp sea salt
1/2 tsp vanilla
1 TB Cinnamon Sugar Cookie spice
or 1 tsp cinnamon + 2 tsp coconut sugar

Directions:

  1. Preheat oven to 375F.
  2. Spread pecans onto a lined sheet tray and roast for 10-12 minutes.
  3. Add pecans to a food processor and process on high speed for 10-12 minutes, pausing periodically to scrape down the sides.
    • First, the pecans will break down and form small crumbs. Then, they’ll start to blend but will be very grainy. You know it’s perfect when it is runny and fully blended–be patient! You don’t need to add anything for the pecans to blend; they will release natural oils as you blend them.
  4. Add the sea salt, vanilla, and Cinnamon Sugar Cookie spice (or alternatively cinnamon and sugar), then continue to blend for 1-2 more minutes.
  5. Scrape into a jar and enjoy with fruit, yogurt, crackers, chocolate, drizzled onto ice cream or oatmeal, by the spoonful…

Notes:
-Should be good for up to 1 month, but guarantee it won’t last that long.
-Recipe makes about 3/4 – 1 cup pecan butter, or 6-8 2 TB servings.

Posted in Food, Healthy, Paleo, Recipes, vegan | Tagged , , , , , , , , , , , , , , , , , , , , , | Leave a comment

Mustard Pretzel Brussels Sprouts (Paleo, Whole30, Vegan)

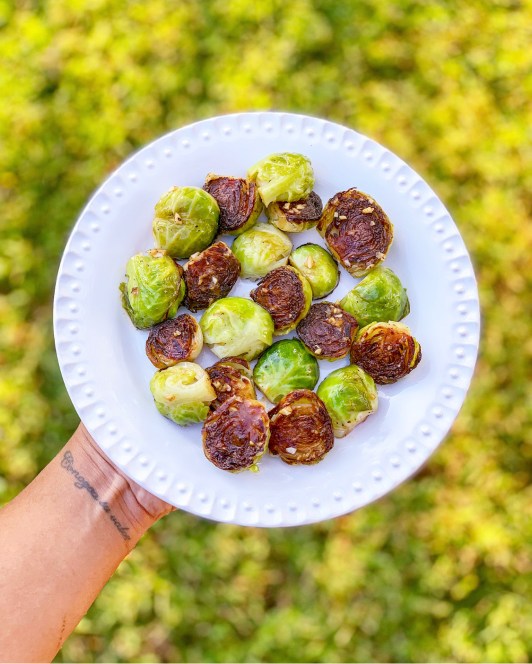
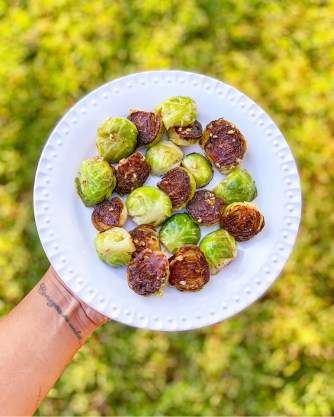
I can confidently say that these are probably some of the best brussels you will ever have (if you love mustard). And that most of you likely have never cooked brussels using this method.

I actually learned this method from Ronny at Primal Gourmet and it forever changed my life. Perfectly cooked brussels in 10 minutes? YES PLEASE.

Also, this method allows for even cooking and perfect caramelization on the bottom of the brussels. They get nice and soft, but they soak up the vinaigrette so well. It’s truly a heavenly culinary experience that you’ll only understand if you try it.

If you think brussels sprouts are tough or don’t like the rough texture, I recommend you try them this way. They melt in your mouth in the best way, and the flavor is unparalleled.

Enjoy!!

FullSizeRender-28

Mustard Pretzel Brussels Sprouts

  • Servings: 2-3
  • Difficulty: easy
  • Print

FullSizeRender-28

Ingredients:

1 lb brussels sprouts (about 2 cups; fresh, not frozen)
3-4 TB olive oil

For the vinaigrette:
1 TB coconut aminos
2-3 cloves garlic, minced
1/4 tsp fish sauce (omit for vegan)
1 TB Dijon mustard
1 TB avocado oil
3/4 tsp smoked sea salt
1 TB lemon juice
1/4 tsp black pepper

Directions:

  1. Rinse the brussels and dry them well. Carefully cut off the bottom ends, then remove the outer layer. Cut them in half, lengthwise.
  2. Lay the brussels sprouts cut side-down in a single layer in a cold, 12″ skillet.
    • I’ll usually just cut the brussels and arrange them in the skillet as I go.
    • Take care not to crowd the skillet and keep the brussels in a single layer (see photo in notes) to promote caramelization.
  3. Add 3-4 TB olive oil to the skillet and give it a little shake to disperse evenly.
  4. Cover the skillet with a lid, and place it on medium-high heat for about 5 minutes.
    • Check after 5 minutes to see whether the brussels have started to brown on the bottom. If not, give them another minute or so. If so, move on to the next step.
  5. Remove the lid and cook for another 4-5 minutes.
  6. While the brussels are cooking, make the vinaigrette by combining all the ingredients in a small bowl and whisking to mix well.
  7. When the brussels are done, turn off the heat and pour the vinaigrette into the pan, and gently stir to combine. This will gently cook the garlic which will mellow out the flavor and balance it perfectly.
  8. Serve immediately and spoon vinaigrette from the pan over the brussels.

Notes:
-Best eaten immediately,  but can be stored in the fridge for 3-4 days and reheated on a skillet or in the microwave.
-If you don’t have smoked sea salt, regular salt works in a pinch. But the smoked salt adds a unique flavor that goes really well in this recipe! I buy mine from Amazon and love using it to amp up salads, dressings, etc.
-Feel free to double this recipe, but it will either need to be cooked in 2 batches, or in separate pans.
-Here’s what the brussels should look like in the pan:

IMG_0843

FullSizeRender-29

Posted in Food, gluten free, Healthy, Paleo, Recipes, vegan, Whole30 | Tagged , , , , , , , , , , , , , , , , , , , , , , , , , , , , | Leave a comment

Sardine Superfood Patties (Paleo, AIP, Whole30)

I know. I know. Sardines are an intimidating food, and many of you may not feel brave enough to try them. I was among your ranks a mere 6 months ago. I bought a tin and let it sit in my pantry for months before I felt ready to give them a go.

I piled the sardines on top of crackers with mustard, lemon, and Trader Joe’s Everything but the Bagel Seasoning. The acidity + salt + crunch was a winning combo, and I instantly fell in love. The health benefits are immense too, and you can check out some info about it here.

Sardines kiiiiiind of make me feel like I have superpowers. I don’t quite know how to explain it, but I can feel the power running through my veins when I eat them. I’ve been trying to find more ways to incorporate them into my diet so I can continue reaping the benefits!

I heard from many of you the first time I posted on Instagram about sardines, and that’s when I decided to come up with a more user-friendly recipe for you (and me!) to enjoy this incredibly nutrient dense fish. These patties don’t taste fishy (and don’t smell too fishy, so they’re work lunch-friendly!), are packed with flavor and nutritional benefits, and come together in no time at all. Bonus points because they’re so easily customizable based on what you already have at home!

My good friend Shivangi from Raody Recipes graciously tested this recipe for me, using some simple substitutions based on what she had at home. Great news–her subs worked perfectly!! Even better news: she captured these beautiful photos you see of the patties. She generously offered for me to share her photos with the recipe since mine were less than stellar (especially compared to her gorgeous photos!!). She was nervous about reintroducing seafood, but rest assured by the stream of texts I got in ALL CAPS after she tried them, she loved them just as much as I did 🙂

Subs for ingredients are listed in the Notes section, so be sure to check those out if you want to make any substitutions!

IMG_0686

Sardine Superfood Patties

  • Servings: 3-5
  • Difficulty: easy
  • Print

IMG_0687

Ingredients:

2 cups cubed butternut squash
2 tins Wild Planet sardines in olive oil w/ lemon
1 TB olive oil from sardine tin
2 TB Primal Palate French Onion Seasoning
(or seasoning of choice)
2 TB hemp hearts (optional, not AIP)
1/4 cup tapioca flour/starch
1 egg or 1 TB gelatin for AIP

For pan-frying:
Olive oil, avocado oil, ghee, or coconut oil

Directions:

  1. Add butternut squash to a medium-sized pot with enough water to fully submerge the squash, then boil on medium-high heat until the squash is soft, about 15 minutes.
  2. Drain the water and carefully mash the butternut squash.
  3. Combine all ingredients (except the oil to be used for pan-frying) and use your hands to mix well until fully combined.
    • Be sure to only use 1 TB oil from the sardine tins–you don’t want to dump in the entire tin with the oil.
  4. Form into patties that are about 2 inches in diameter. You should have about 12 patties.
  5. Heat a skillet on medium heat, and add 1 TB fat/oil of choice. Carefully pan-fry patties for about 3-4 minutes per side or until browned on both sides.
    • Cook in batches, careful not to crowd the pan. You want them to get nice and crispy, and crowding the pan will prevent that! I recommend cooking 4 at a time, and adding 1 TB fat for each new batch.
  6. Serve with a dipping sauce, aioli, ketchup, or just enjoy on its own and unleash your inner super powers.

Notes:

  • Butternut squash can easily be replaced with mashed sweet potato or even 1 15oz can pumpkin puree. Any of these options work well!
  • If you use sardines stored in water, then drain them and add 1 TB lemon juice + 1 TB olive oil to the patty mixture.
  • If you use sardines stored in olive oil (without lemon), then add 1 TB lemon juice to the mix.
  • Play around with the seasoning, but make sure your seasoning blend already has salt added! These would be fabulous with Trader Joe’s Everything but the Bagel seasoning, an Adobo seasoning, seasoning salt, Italian seasoning, pretty much any blend will give it new life!
  • Tapioca flour can easily be replaced with arrowroot powder or cassava flour; however, I wouldn’t recommend using almond flour or coconut flour here.
  • Patties can be refrigerated for 5-7 days or frozen for up to 3 months.
  • To reheat, you can microwave, pan-fry, heat in a toaster or oven, or (my favorite) reheat in an air fryer.

IMG_0689.JPG

Posted in AIP, Autoimmune Protocol, Food, gluten free, Healthy, Paleo, Recipes, whole 30 | Tagged , , , , , , , , , , , , , , , , , , , , , , , , , , , , , , | Leave a comment

Garlicky Roasted Cabbage (Paleo, AIP, Whole30, Vegan)

I eat this roasted cabbage at least once a week. It’s currently my favorite vegetable and my favorite way to eat it. It’s so easy, comes together quickly, and the taste will completely blow you away. That crispy texture, the caramelization, the browned garlic…all of it.

Here’s just a few plates that are evidence of how often I make, eat, and love this cabbage:

So vibrant and perfect every single time. I hope you love it as much as we do!

Image-1-6

Garlicky Roasted Cabbage

  • Servings: 2-3
  • Difficulty: easy
  • Print

Image-1-6

Ingredients:

1/2 head cabbage
6 cloves garlic, minced
Salt
Pepper
Avocado oil or olive oil

Directions:

  1. Preheat your oven to 375°F.
  2. Carefully slice the tough core out of the cabbage, then slice cabbage into 1/4-1/2inch slices (give or take, thin but sturdy enough to stay together).
  3. Line a rimmed baking sheet with parchment paper, or spray a rimmed baking sheet with cooking spray.
  4. Lay the cabbage slices onto the baking sheet in a single layer. Don’t forget those little pieces that fall off when you sliced the cabbage–throw them on the pan too because they’re the best part!
  5. Top the cabbage in this order: minced garlic (spread out evenly so it doesn’t burn), avocado oil or olive oil (a spray works really well here if you have one), salt, and pepper.
  6. Roast at 375 until browned, about 30-35 minutes.
  7. Enjoy, and try not to eat it all straight from the pan!

Notes:
-Best enjoyed immediately, but if you have leftovers they will keep for 4-5 days in the refrigerator. I recommend crisping them back up on a skillet on the stove.
-Feel free to mix up the seasonings if you want. I added smoked paprika and used garlic powder when I made this for a client and it was loved by all!


Posted in AIP, Autoimmune Protocol, Food, gluten free, Healthy, Paleo, Recipes, vegan, Whole30 | Tagged , , , , , , , , , , , , , , , , , , , , , , , , , , , , , , , , , , , , , , , , , | Leave a comment

Chimichurri Chicken Nuggets (AIP, Paleo, Whole30)

You’ll notice that this recipe doesn’t have quantities included for several ingredients. That’s because I want you to eyeball it! Use the amount you think you need–put your own spin on it. It’s  always better to start small and add more instead of wasting ingredients, but aside from that it’s fun to play with it instead of specifically measuring out things sometime.

Here is the chimichurri I recommend for this recipe. It’s absolutely bursting with flavor and will give your nuggets a bright flavor punch! Feel free to add some crushed red pepper into the mix if you want to spice things up a bit, but it’s incredibly flavorful on its own.

I hope you enjoy this easy chicken nugget recipe, from my kitchen to yours!

IMG_9294

Chimichurri Chicken Nuggets

  • Servings: 4-6
  • Difficulty: easy
  • Print

FullSizeRender-10

Ingredients:

Chimichurri
Olive oil
Chicken breast or thighs
Tapioca flour/starch
Salt
Pepper (omit for AIP)
Avocado oil or ghee for pan frying

Directions:

  1. Either pound chicken thin, or carefully slice in half lengthwise to have two thinner cutlets instead of one thick piece. Then carefully slice into nuggets of desired size.
  2. Add some chimichurri to a shallow bowl. Use some olive oil to thin it out until it’s runny. Be sure to mix well.
    1. Alternatively: Mix chicken with some chimichurri, then cover and place in refrigerator for at least 1 hour, up to overnight, to marinate. Then proceed with the following steps.
  3. To a separate shallow bowl, add tapioca flour, salt, and pepper (omit for AIP).
    1. How much? However much you need to coat the amount of chicken you have. Better to start lower, then add more (+ salt/pepper) if you need it.
  4. Use one hand to dip both sides of chicken into thinned out chimichurri (skip this step if you marinated your chicken), then gently shake off excess.
  5. Use the same hand to carefully place chicken into the tapioca flour mixture.
  6. Use your other hand to sprinkle tapioca flour onto the chicken and make sure it’s evenly coated. Set aside and repeat this process for all nuggets.
  7. Heat avocado oil or ghee on medium heat. Once heated, carefully place chicken onto pan in a single layer, taking care not to crowd the pan (you’ll have to do multiple batches)
  8. Cook, undisturbed, until bottom side is golden brown, about 2 minutes.
  9. Flip and cook on the other side until golden brown as well, another 2 minutes. You may have to flip the nuggets a couple of times to ensure even cooking and browning.
  10. Set on a paper towel to drain excess oil.
  11. Add more oil, then repeat process until all nuggets are cooked.
    1. The tapioca flour on the nuggets may burn if you don’t use oil, so be sure not to cook on a dry pan.
  12. Enjoy!! I recommend dipping into chimichurri for maximum flavor. 🙂

Notes:
-While, as mentioned, you can make chimichurri, slice chicken, and even marinate chicken ahead of time, only dredge with tapioca flour mixture immediately before frying; otherwise it will get gummy in texture and won’t crisp up the same.

Posted in AIP, Autoimmune Protocol, Food, gluten free, Healthy, Paleo, Recipes, Whole30 | Tagged , , , , , , , , , , , , , , , , , , , , , , , , , , , , , , , , | Leave a comment

Plum Sticky Takeout Chicken (AIP, Paleo, Whole30)

When I had surgery last time, I cooked big batches of several proteins and froze them in individual portions. It was a way for me to regain some sense of control in a situation in which I felt so helpless.

And honestly, it helped. It made me feel more calm, gave me comfort in knowing I would have plenty of delicious, nutrient dense food ready for me as I recovered, and made me feel incredibly proud of myself for managing to have such clarity during a challenging time.

Additionally, it helped my mom immensely. She didn’t have to ask me a million and one questions about what I could/couldn’t eat, and she didn’t have to spend hours in the kitchen preparing meals for me. Instead, she was able to spend that time WITH me and help focus on other areas of recovery.

For these reasons, I did the exact same thing leading up to this surgery. My freezer is stocked and we’re ready to tackle this next hurdle.

This is one of the recipes I made a big batch of and froze. It is DELICIOUS, reheats beautifully, and honestly tastes like takeout. The texture of the chicken with the marinade and tapioca breading blew my mind, and the sweet and sour sticky sauce made this totally craveable.

I hope you enjoy it as much as we do!

FullSizeRender-10

Plum Sticky Takeout Chicken

  • Servings: 6
  • Difficulty: easy
  • Print

FullSizeRender-9

Ingredients:

2 lbs chicken breast, thinly sliced
2 TB tapioca starch
Avocado oil, olive oil, or ghee

Marinade:
2 TB coconut aminos
1 tsp fish sauce
1 tsp sesame oil (omit for AIP)
1 tsp garlic powder
1 tsp ginger powder
1/2 tsp black pepper (omit for AIP)

Sauce:
1/2 cup coconut aminos
1 TB sesame oil (omit for AIP)
1 TB fish sauce
1/2 tsp black pepper (omit for AIP)
2 plums, pits removed (skin on)
1 tsp ginger powder
3 cloves garlic, minced
Juice of 1 lime

Slurry:
1 TB tapioca starch
1/4 cup broth or water

Directions:

  1. Combine marinade ingredients in a bowl, container, or ziploc bag. Add chicken and toss to evenly coat. Marinate for at least 30 minutes, up to overnight.
  2. When ready to cook, add tapioca starch to the marinated chicken and toss well to combine and evenly distribute the tapioca starch.
  3. Heat a pan on the stovetop on medium heat. Add 1 TB oil of choice and cook chicken pieces in a single layer, taking care not to crowd the pan.
    • Lie pieces flat on one side, allow to cook for 1-2 minutes or until lightly brown, then flip and cook 1-2 minutes on the other side (until both sides are lightly browned).
    • After the chicken is cooked, transfer to a paper towel-lined plate to drain excess oil.
    • You’ll have to cook the chicken in several batches so you don’t overcrowd the pan. If the pan is too crowded, the chicken will not brown evenly and you will sacrifice flavor!
  4. To make the sauce:
    1. Add sauce ingredients to a medium-sized pot and bring to a boil.
    2. Allow to boil for 1 minute, then remove from heat and carefully blend (either with an immersion blender or a regular blender) until smooth.
    3. After blending, pour sauce back into the pot.
    4. Whisk together the slurry ingredients until well combined.
    5. Add slurry to the pot and whisk to combine well.
    6. Turn the heat on low and bring mixture to a boil.
    7. After it starts boiling, turn off the heat and allow it to sit.
  5. When chicken is finished cooking, turn heat to low, add sauce to the chicken pan, then add all the chicken back in.
  6. Use tongs to toss the chicken in the sauce until evenly coated, then allow the sauce to reduce and thicken for another 5 minutes or so.
  7. Sprinkle with cilantro, Everything but the Bagel seasoning (from Trader Joe’s; not AIP), sesame seeds (not AIP), and/or chopped green onions, and enjoy! Delicious with cauliflower rice, zoodles, or even on its own.

Notes:
-Will keep for up to 5 days in the refrigerator. To reheat, either cook on a skillet or microwave.

Posted in AIP, Autoimmune Protocol, gluten free, Healthy, Paleo, Recipes, Whole30 | Tagged , , , , , , , , , , , , , , , , , , , , , , , , , , | 4 Comments

Purple Sweet Potato Sauce (Paleo, AIP, Whole30, Vegan)

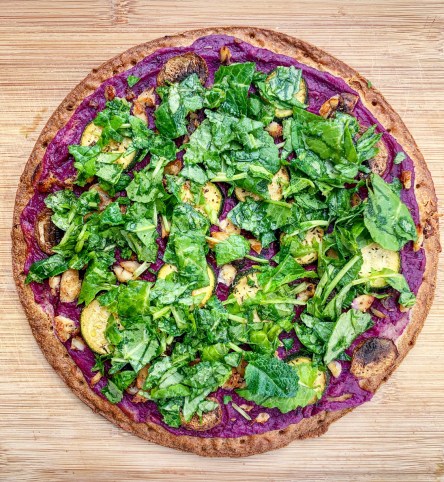
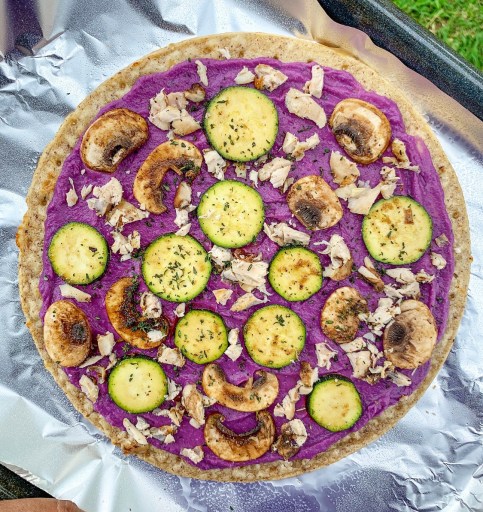
I wanted to make pizza for dinner one night, but I knew I wanted the sauce to be more filling than your average pizza sauce. I grabbed a purple sweet potato and threw together this vibrant, delicious sauce that I absolutely had to share with you!

I topped the pizza with sliced mushrooms, zucchini, and leftover cooked chicken (all tossed in some olive oil, balsamic, salt, + pepper) and baked it according to the instructions for the store-bought crust (this is the crust I used–it is neither AIP nor Whole30 compliant, but it was a fantastic treat that worked well for me). After it was finished in the oven, I topped it with some baby kale that I had tossed in olive oil, balsamic, salt, + pepper. SO GOOD, PEOPLE.

One of the ingredients this recipe calls for that may not be as familiar to you is umeboshi paste. Umeboshi are a kind of Japaense plum that have been fermented. You can read about some of the health benefits of it here. It’s sour and salty (I think it tastes kind of like tamarind), and adds a perfect punch of umami + acidity if used correctly. If you cannot access Umeboshi paste (I bought mine on Thrive Market, but you should be able to find at other health food stores or on Amazon), then you can replace it with the recommended amount of fish sauce + lemon juice. It won’t be the exact same, but it will still give you the umami and acidity components that a sauce like this needs (just note if using fish sauce that the sauce is no longer vegan)!

IMG_9064

Purple Sweet Potato Sauce

  • Servings: 4-6
  • Difficulty: easy
  • Print

IMG_9297

Ingredients:

1 large purple sweet potato (or any sweet potato)
1 tsp olive oil
2 TB fresh thyme
1 large shallot or 1 small onion
4-5 cloves garlic
1/2 cup coconut milk
1/4 cup broth (bone, chicken, or vegetable)
1 tsp umeboshi paste (or 1/2 tsp fish sauce + 1 TB lemon juice)
1/2 tsp salt + more to taste
Pepper to taste (omit for AIP)

Directions:

  1. Scrub the sweet potato clean, then cut into large chunks and add to a pot (large enough to accommodate being able to fit the sweet potato + enough water to fully cover the sweet potato). Pour water into the pot until the sweet potato chunks are fully submerged.
  2. Put the pot on medium-high heat and set a timer for 20 minutes.
    • After 20 minutes, check to see whether the potatoes are fork tender. If so, then remove from heat. If not, allow to boil for 3-5 more minutes and check again.
  3. While potatoes are boiling, chop the shallot (or onion) and garlic, and get your other ingredients measured and ready, but separate.
  4. When potatoes finish boiling, remove from heat then carefully (don’t burn yourself!!) peel the skin off. It’ll come off easily once the sweet potatoes are cooked!
  5. Rinse the pot (and admire the pretty blue water), then set it back on medium-high heat. Add 1 tsp olive oil, then add the chopped shallot and sauté until starting to brown, about 4 minutes.
  6. Add the garlic and sauté until fragrant, about 1 minute.
  7. Add coconut milk and broth, and scrape the bottom of the pan with a wooden spoon to pick up all the browned bits. Bring to a boil and allow to boil for 1 minute.
  8. Add the cooked sweet potato, fresh thyme, umeboshi paste (or fish sauce + lemon juice if using), salt, and pepper.
  9. Use an immersion blender to blend the sauce until velvety and smooth.
    • Alternatively, you can carefully add ingredients to a blender and blend until smooth.
  10. Spread onto a pizza with toppings to bake, use as pasta sauce, use as a sauce for veggies, spoon over chicken, or however else you wish, and enjoy!

Notes:
-This sauce will keep in the fridge for 4-5 days. I would not recommend freezing.
-Feel free to use a different variety of sweet potato if you cannot access purple!
-Also, replace fresh thyme with another herb of your choice, based on preference or availability. Rosemary or dill would be excellent here as well.

img_9053.jpeg

Posted in AIP, Autoimmune Protocol, Food, gluten free, Healthy, Paleo, Recipes, vegan, Whole30 | Tagged , , , , , , , , , , , , , , , , , , , , , , , , , , , , , , , , , , , , | Leave a comment