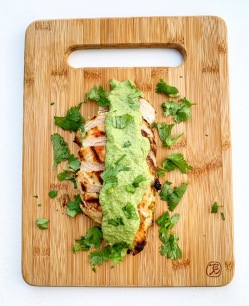
Caramelized Balsamic Chicken Wings (Paleo, AIP, Whole30)

IMG_6892.jpeg

Caramelized Balsamic Chicken Wings

  • Servings: 2-3
  • Difficulty: easy
  • Print

IMG_6892

Ingredients:

2lbs chicken wingettes & drumettes
1/4 cup avocado oil
2 TB balsamic vinegar
1 tsp salt
1/2 tsp black pepper (omit for AIP)
1 tsp garlic powder
1/2 tsp onion powder
1/2 tsp dried basil
1/2 tsp dried oregano
1 tsp dried chives
Juice of 1 lemon
OR 
2lbs chicken wingettes & drumettes
1/3 cup Primal Kitchen Balsamic Vinaigrette

CONVENTIONAL OVEN DIRECTIONS:

  1. Add chicken to a gallon-sized ziploc bag or equivalent bag/container.
  2. Add remaining ingredients to a bowl and whisk to combine well until incorporated, about 30 seconds.
  3. Pour marinade into bag or container with chicken.
    • If using a bag, then press the air out and seal the bag, then massage to make sure all the chicken is covered, then place flat into the refrigerator.
    • If using a container, then use a large spoon to gently toss the chicken until it is all covered in the marinade, then put a lid on the container and place into the refrigerator.
  4. Refrigerate at least 4 hours or preferably overnight, tossing wings once to redistribute marinade
    • If using ziploc bag, can just flip and place on other side.
    • If using container, hold the lid down and gently shake the container to toss the wings.
  5. To cook, preheat oven to 400°F.
  6. Layer a grid baking rack over a rimmed baking sheet.
  7. Lie wings onto the rack in a single layer, careful not to crowd the rack.
  8. Bake for 45 minutes-1 hour, or until browned and crispy (check at 45 minutes and keep in for an additional 5-15 minutes if they aren’t browned).
  9. Remove from oven and serve immediately!

AIR FRYER DIRECTIONS:

  1. Follow steps 1-4 outlined in regular instructions.
  2. Preheat air fryer to 375 degrees.
  3. Carefully place wings into air fryer (they can overlap) and set timer for 16 minutes.
  4. Shake the air fryer basket to toss the wings every 5 minutes or so–this will ensure even cooking and browning (and CRISPING).
  5. Turn heat up to 400 degrees for 5 minutes, shaking the air fryer basket twice during that time (every 1 1/2 minutes or so).
  6. Serve and enjoy!

Notes:
-These are best served immediately. They will keep for 3-4 days in the refrigerator, but the meat will likely dry out when you reheat. For best results, reheat on a skillet to crisp up the skin.

Posted in AIP, Autoimmune Protocol, Food, gluten free, Hidradenitis Suppurativa, Paleo, Recipes, Whole30 | Tagged , , , , , , , , , , , , , , , , , , , , , , , , , , , , , , , , , , , , | Leave a comment

Healing Watermelon Mint Juice (Paleo, AIP)

Image-1-2

Healing Watermelon Mint Juice

  • Servings: 1
  • Difficulty: easy
  • Print

FullSizeRender-1

Ingredients:

1 1/2 cups cubed watermelon
1/4 cup coconut water
5 fresh mint leaves
Juice of 1/2 lime
Pinch salt
1 scoop unflavored collagen

Directions:

  1. Add all ingredients to a blender and blend on high for 30 seconds or until liquified.
  2. Strain through a nut milk bag or clean kitchen towel (gets rid of the pulp and makes for a perfectly smooth glass of juice).
  3. Pour over ice, and enjoy!

Notes:
-Feel free to multiply this recipe to feed more than one person!
-Recipe makes 1 tall glass, so if using shorter glasses it could easily serve 2.
-Will keep in the fridge for 3-4 days, but best served immediately.
-Freeze into ice cubes and use in smoothies or frozen beverages (alcoholic or non) instead of ice!

Posted in AIP, Autoimmune Protocol, Food, gluten free, Healthy, Paleo, Recipes, Whole30 | Tagged , , , , , , , , , , , , , , , , , , , , , , , , , , , , , , | Leave a comment

Candy Fruit Salad (AIP, Paleo)

Last month, I did the most fun giveaway I’ve ever done. I hosted a giveaway for the personal chef experience for a winner and guest of their choice here in the Oklahoma City Metro! It was for me to create a menu based on their preferences and restrictions, then go to their home on a pre-determined date and cook dinner for them.

It was SO much fun. I went to the winner’s home yesterday (who happened to be a friend from grad school!) and made dinner for her family. It was fun to play with different flavors, ingredients, and textures.

I admitted early on that dessert wasn’t my forté, so instead opted to make a fruit salad with homemade whipped cream for them for dessert. I’ve been making this fruit salad for years and it’s my go-to recipe!

It’s my favorite contribution to potlucks, etc because then I know there’s something sweet I can eat. I also made this (without the mint) for my best friend’s baby shower a couple of months ago, and it was a hit as well.

However, whenever, wherever you make this, I hope you love it as much as we do.

FullSizeRender-5

Candy Fruit Salad

  • Servings: 5
  • Difficulty: easy
  • Print

FullSizeRender-3

Ingredients:

1 cup chopped strawberries
1 pint blueberries
1 cup green grapes, halved
1 cup chopped pineapple
1 cup chopped apricots
(Or 5-6 cups chopped fruit of your choice)
1 TB honey
Zest of 1 lemon
1 TB lemon juice
Optional: 1 TB finely chopped mint

Optional Whipped cream ingredients (NOT AIP or Paleo):
1 pint heavy whipping cream
3/4 tsp vanilla
1/4 tsp salt
3 TB coconut sugar

Fruit Salad Directions:

  1. Add all fruit to a suitable-sized mixing bowl and gently toss to combine.
  2. Drizzle on the honey, add lemon zest and juice, and sprinkle on mint if using, then gently stir to combine well.
  3. Place in fridge to marinate for at least 30 minutes, up to 2 hours.
  4. Gently toss to redistribute flavors when serving.
  5. Serve and live your happiest summery fruit salad dreams.

Whipped Cream Directions:

  1. Add all whipped cream ingredients to a metal bowl or bowl of a stand mixer if using (I don’t have a stand mixer, so I just used a whisk).
    • Tip: Store the metal bowl AND whisk in the freezer for 30 minutes before making the whipped cream. It’ll come together much more quickly!
  2. Whisk until peaks form, or turn the stand mixer on low-medium speed until peaks start to form. Be careful not to over-mix because it goes from perfectly whipped to too thick in the blink of an eye!
  3. Serve fruit salad with a generous dollop of whipped cream. Or eat spoonfuls right out of the bowl. Either way, devour.

Notes:
-This fruit salad will keep for a few days in the fridge, but the colors will start to run together so it may not be as vibrant. Best to make it the day you want to serve it.
-Zest the lemon before you juice it, otherwise it’ll be too flimsy to zest.
-Whipped cream will keep for up to 5 days in the fridge.

Posted in AIP, Autoimmune Protocol, Food, gluten free, Healthy, Paleo, Recipes, Uncategorized | Tagged , , , , , , , , , , , , , , , , , , , , , , | Leave a comment

Savory Egg White Oat Muffins (GF)

I recently began work as a personal chef, and I am loving it! My client has a pretty strict food schedule with specific amounts of protein, veggies, and carbs he’s allotted for each meal, but I’m allowed full creative freedom. It’s like using the same pieces of a puzzle to make different creations, and it has been so much fun for me.

Here’s an example. Breakfast includes 5 egg whites, 1/2 cup spinach, 1/2 cup GF oats, and 1/4 avocado. That’s my template, but I can add other veggies or play with it to keep it interesting with him (I’m not about to serve him scrambled egg whites with sautéed spinach on a daily basis–I wouldn’t even be able to stomach that on the daily).

This is one of the meals I came up with to use these ingredients! They’re wonderful, easy, come together in a flash, are supremely poppable for easy breakfasts, and have enough flavor to make you actually look forward to breakfast. Even better because they will keep you full!

I hope you enjoy these as much as I have enjoyed making them (and my client has enjoyed eating them).

Other fun recipes I’ve come up with involving this template have included a sweet version of these (coming soon), a stuffed omelet, and green pancakes (which I will make again and measure the ingredients so I can share it here too).

FullSizeRender-4

Savory Egg White Oat Bake

  • Servings: 12
  • Difficulty: easy
  • Print

FullSizeRender-3

Ingredients:

-15 egg whites (or 7-8 whole eggs)
-1 1/2 cups GF old fashioned oats
-3/4 bell pepper (any variety)
-1 poblano pepper
-1 jalapeño pepper
-1 1/2 cups spinach, roughly chopped
-2 garlic cloves, minced
-1/2 cup basil, chopped
-1 tsp salt (+ more to taste)
-dash hot sauce of choice
-avocado oil

Directions:

  1. Add oats and egg whites to a bowl, and stir to combine. Allow to sit while you prepare the rest of the ingredients because the mixture will thicken slightly.
  2. Rub the bell pepper, poblano, and jalapeño in a small amount of oil, then lay on a sheet tray and place into the oven. Broil until browned (approximately 7 minutes, flipping halfway through–keep an eye on it so they don’t burn).
  3. Sauté spinach and garlic until slightly wilted. Allow to cool completely (feel free to place it in the refrigerator for a couple of minutes to speed up the process).
  4. When you remove the peppers from the oven, leave the door open to cool the oven down some, then preheat oven to 375°F.
  5. Once peppers are cool enough to handle, dice them.
    • I left the seeds in the poblano and jalapeño pepper to make it spicy, but if you don’t like a lot of heat then be sure to remove the seeds during this step.
  6. Add spinach/garlic mixture and peppers to the bowl with egg whites and oats, then add the rest of the ingredients (hot sauce, basil, and salt). Mix well to combine.
  7. Spray a muffin pan with avocado oil spray (or spray of your choice). Divide the mixture evenly between the 12 muffin tins (approximately 1/3 cup mixture per muffin).
  8. Place into oven and bake for 20-25 minutes, or until they have raised and the tops are starting to brown while the sides pull away from the pan.
    • 20 minutes was perfect for me, so I would err on the side of 20 minutes so they don’t dry up.
  9. When cool enough to handle, the muffins should pop right out of the pan! You may need to run a butter knife around the sides, but otherwise they will come out very easily.
  10. Enjoy with avocado, another dash of hot sauce, or with whatever sides tickle your fancy!

Notes:
-Don’t have a muffin pan? No problem! Pour the mixture into a greased/sprayed 9×13 pan and bake for 5-10 minutes longer (25-30 minutes), or until the center doesn’t jiggle (technical term).
-These will keep for up to 5 days in the fridge.
-Reheat by microwaving for 2 minutes or until warmed through.
-Replace peppers with ~3/4 cup other veggies to mix it up! Mushrooms, broccoli, carrots, asparagus…so many great options. Be sure to roast them before to add flavor 🙂

I made a smaller version of the recipe and baked it into a dish, and it worked well too!

FullSizeRender-5

Posted in Food, gluten free, Healthy, Recipes | Tagged , , , , , , , , , , , , , , , , , , , , , , , , , , , , | Leave a comment

Dear Hidradenitis Suppurativa

Dear Hidradenitis Suppurativa,

You snatched away my privacy; but you taught me humility.

For a time, you took away my ability to walk; but you taught me to cherish the movements of my body.

You took away my ability to feed myself or brush my own teeth; but you taught me to rely on other people and ask for help.

You’ve given me miles and miles of scars; but you taught me that there is so much more to a person’s beauty than their skin.

You created a lifelong battle with my body; but you taught me to forgive her and engage her with compassion instead of anger and hatred.

You continually break the hearts of my family members; but you’ve strengthened our bond and shown us what we’re capable of weathering together.

You’ve isolated me, causing me to miss countless important moments in the lives of friends and family; but you gave me a community of warriors who make me feel seen and understood.

You’ve torn apart my body and broken her time and time again; but you’ve taught me about the incredible healing powers my body possesses, and what she can overcome.

You’ve made me wish I was dead, made me want to give up on fighting; but you taught me that when I’m too tired and weary to fight, that my family will fight for me and save me.

You made me want to hide my scarred body and soul from the world; but you taught me the strength in vulnerability, that my vulnerability could give others strength to fight.

You brought upon the most suffocating depression, anxiety, and PTSD I could ever have imagined experiencing; but you taught me to be patient with myself and give myself grace while I healed from incredible mental, physical, and emotional trauma.

You gave me so much pain that I often forgot that I was human; but you taught me that I am a fighter and that no pain is great enough to break my spirit.

You’ve taken so much away from me; but you’ve given me purpose.

So much of my life has been spent resenting you, when in reality I have you to thank for the parts of me that I treasure most.

I’ve resisted you, cursed you, hated you, protested you; but I’ve never thanked you.

Until today.

Thank you, Hidradenitis Suppurativa.

Thank you for all that you’ve given me.

Love,

Pooja

IMG_3283

Posted in Anecdotes, Hidradenitis Suppurativa, mental health | Tagged , , , , , , , , , , , , , , , , , , , , , , , , , , , , | Leave a comment

Ranch Meatballs (AIP, Paleo, Whole30)

Meatballs that taste like ranch. But made with real ingredients. Need I say more?

IMG_8513

Ranch Meatballs

  • Servings: 8-10
  • Difficulty: easy
  • Print

IMG_3442

Ingredients:

2 large shallots or 1 medium onion, minced
1/4 cup fresh dill, finely chopped
1/2 cup fresh parsley, finely chopped
2 TB fresh chives, finely chopped
4-5 cloves garlic, minced
1/4 cup nutritional yeast
2 tbsp grass-fed gelatin (or 2 eggs)
1 1/2 tsp sea salt
2 lb ground turkey, beef, chicken, or pork
High heat cooking fat such as avocado oil or ghee (not AIP)
Water (about 1 cup)
Lemon wedges (to squeeze at the end)

Directions:

  1. Preheat oven to 375°F.
  2. Combine all ingredients except for cooking fat, water, and lemon in a large bowl. Mix well with your hands to combine.
  3. Form into approximately 28-30 meatballs.
  4. In an oven safe skillet (I used a cast iron skillet), heat 1 tbsp cooking fat on medium-high heat (if using pork or higher-fat beef, use less cooking fat since the meat will release its own fat). Sear the meatballs for 2 minutes per side (a total of approximately 4 sides to get a good sear across the entire meatball).
    • Notes:
      • Be sure not to overcrowd the pan. The caramelization that occurs during this process is key and adds so much flavor. Overcrowding the pan will prevent caramelization. I seared my meatballs in 3 batches (of 8-10 meatballs per batch) in a 12-inch cast iron skillet.
      • After you’ve finished a batch, transfer to a paper towel-lined plate.
      • Be sure to quickly wipe down or scrape the skillet between batches to prevent burning.
      • After each batch, add ~1 more tbsp cooking fat for the new batch.
  5. When all the meatballs have been seared, carefully transfer all meatballs back into the skillet in a single layer (they will crowd the skillet but that is OKAY for this part). Add 1 cup of water to the pan, then place into the oven for 15 minutes.
  6. Carefully remove the pan from the oven and discard the water.
  7. Serve the meatballs with a squeeze of fresh lemon for a burst of citrusy flavor, and devour!

Additional Notes:
-These will last for about 5-6 days in the refrigerator and 4-6 months in the freezer.
-Feel free to make these into patties, or form them into larger burger patties (OMG ranch burgers…I can’t). Follow your heart!

Posted in AIP, Food, gluten free, Healthy, Paleo, Recipes, Whole30 | Tagged , , , , , , , , , , , , , , , , , , , , , , , , , , , , , , , , , | Leave a comment

Kid-Friendly Oven-Baked Black Bean Quesadillas

This is the next in my series of kid-friendly recipes!

As I had mentioned before, for my job I was creating easy recipes that kids would enjoy that featured sliiiightly better-for-you ingredients where I could squeeze them in.

I love this quick, easy recipe because you can quickly heat the black beans, mash ’em, slap the tortillas together, then throw them into the oven, leaving your hands free to do other things (like feeding your kid a snack because they can’t wait until dinner). No more waiting at the stove to carefully flip a quesadilla to brown both sides–what a luxury!!

If you missed the last recipe for Kid-Friendly Veggie Pasta Salad, you probably aren’t familiar with our very scientific data collection method for seeking feedback on whether or not the kids liked the food. If they liked it, we asked them to give us a thumbs up; if they loved it, they were to give two thumbs up; if they couldn’t get enough, they were to thrust their hands in the air and wiggle their fingers. I’m delighted to report that these quesadillas got wiggly fingers from all our very sophisticated taste testers!

FullSizeRender-4

  • Servings: 4
  • Difficulty: easy
  • Print

FullSizeRender-5

Ingredients:

1 can black beans (no salt added)
1/4 tsp garlic powder
1/2 tsp salt
1/2 tsp cumin
1/2 tsp chili powder
8 6-inch corn tortillas
8oz cheddar cheese, shredded (or shredded cheese of choice)
1-2 TB melted butter or oil

Directions:

  1. Preheat oven to 375°F.
  2. Drain and rinse black beans, then add black beans garlic powder, salt, cumin, and chili powder to a small pot on medium-low heat.
  3. Gently stir with a wooden spoon until warmed through and fragrant, about 3-4 minutes.
  4. Remove from heat and roughly mash black bean mixture with the wooden spoon.
  5. Brush tortillas with oil or butter on one side.
  6. Place 4 tortillas butter/oil-side down on a sheet tray.
  7. Add roughly 1/4 cup mashed black beans and spread onto tortilla, then sprinkle 1/4 cup shredded cheese on top.
  8. Top with another tortilla, oil/butter side up.
  9. Repeat this with all tortillas, until you have 4 assembled quesadillas.
  10. Bake at 375°F until cheese is melted and tortillas are beginning to brown, about 15 minutes.
  11. Carefully remove, slice with a pizza cutter, and serve!

Notes:
-Quesadillas will keep well in the fridge for up to 5 days.
-They reheat well in the microwave or on a skillet.
-Feel free to use different tortillas, cheese, or beans, as you prefer.

Posted in Food, gluten free, Healthy, Recipes | Tagged , , , , , , , , , , , , , , , , , , , , , , , , , | Leave a comment

Instant Pot Savory Butternut Squash Soup (AIP, Paleo, Whole30, Vegan)

FullSizeRender

Instant Pot Savory Butternut Squash Soup

  • Servings: 6-8
  • Difficulty: easy
  • Print

FullSizeRender

Ingredients:

1 cup chopped onions (about 1/2 medium onion)
1 cup chopped carrots
1 TB avocado oil or ghee (not AIP or vegan)
5 cups cubed butternut squash (1 medium butternut squash, cubed)
1/2 tsp salt (+ more to taste)
4 cloves garlic, minced
3 TB fresh herbs
2 bay leaves
4 cups broth (bone, chicken, vegetable)

Directions:

  1. Press the sauté function on the Instant Pot. After a minute or so, add oil or ghee, then add onions, carrots, and cubed butternut squash. Sauté for 10-12 minutes.
  2. Add garlic and sauté for 1 minute.
  3. Add herbs (I used half rosemary, half thyme) and sauté for 1 minute.
  4. Add broth, salt, and bay leaves. Stir to combine, and with a wooden spoon scrape the browned bits off the bottom.
  5. Press cancel, then close the lid, set to pressure cook on high for 25 minutes (manually increase the time to 25 minutes).
    1. Be sure to keep the vent sealed.
  6. After 25 minutes, carefully manually release pressure.
    • Tips:
      • You can put a kitchen towel over the vent before releasing pressure to catch the steam.
      • You can set it under your vent hood.
      • You can take it outside to release the steam (which is what I do)
      • BUT when you release the steam, do it from the side so you don’t get burned by the hot steam! Safety first.
  7. Either use an immersion blender to blend the soup, or carefully transfer it in batches into a high speed blender and blend up until smooth.
  8. Serve, and enjoy!

Notes:
-Keeps well in the fridge for up to a week.

Posted in AIP, Autoimmune Protocol, Food, gluten free, Healthy, Paleo, Recipes, vegan, Whole30 | Tagged , , , , , , , , , , , , , , , , , , , , , , , , , , , , , , | Leave a comment

Cilantro Chutney Chicken (AIP, Paleo, Whole30)

FullSizeRender-5

Cilantro Chutney Chicken

  • Servings: 4
  • Difficulty: easy
  • Print

FullSizeRender-5

Ingredients:

2 lbs chicken (breast or thigh)
1 can coconut milk
1 cup cilantro
1/3 cup green onions (whites & greens)
2 TB lime juice, divided
4 cloves garlic
1 TB fresh ginger (or 1-inch knob ginger)
1 tsp salt

Directions:

  1. Combine all ingredients (except chicken and 1 TB lime juice) in a blender and blend until smooth.
  2. Place chicken into large zip-top bag or glass container and cover with marinade, stirring to coat.
  3. Marinate for at least 1 hour, up to overnight.
  4. When ready to cook the chicken, preheat oven to 375°F. 
  5. Place chicken onto a baking sheet lined with parchment paper or foil (greased, if using foil), and spoon a tablespoon of marinade on top of each chicken breast or thigh.
  6. Bake until thickest part of chicken reaches an internal temperature of 165°F.
    • For boneless chicken breasts, this will be 25-30 minutes.
    • For boneless chicken thighs, this will be closer to 35-40 minutes.
  7. While chicken is baking, pour remaining marinade into a medium-sized pot and bring to a boil. Turn the heat down and allow it to simmer until it thickens and easily coats the back of a spoon, about 15 minutes.
    • Keep an eye on it because when it thickens, the mixture will start to sputter and make a mess–that’s another sign that it’s done!
  8. When sauce is done, stir in the remaining 1 TB lime juice.
  9. When chicken is done baking, allow it to rest for 5 minutes.
  10. Top chicken with sauce and serve.
  11. Lick your plate clean.

Notes:
-Feel free to cook the chicken however you’d like. I grilled mine and it was divine.
-Not sensitive to nightshades? Throw in some crushed red pepper or cayenne for a kick!
-If using bone-in chicken, just be sure to cook it until it reaches 165°F.
-Leftovers will keep in the refrigerator for up to 5 days.

Posted in AIP, Autoimmune Protocol, Food, gluten free, Healthy, Paleo, Recipes, Whole30 | Tagged , , , , , , , , , , , , , , , , , , , , , , , , , , , , , , , , | Leave a comment

Grain-free “Oatmeal” (AIP, Paleo, Vegan)

Sometimes, when it’s freezing and pouring outside, and you have a cold, you just want a comforting bowl of oats. You want that warm, creamy, cinnamon-y bowl that soothes your soul and fills you up.

But what to do when grains aren’t your friend?

I threw this together on my stovetop and couldn’t believe how much it tasted like the real thing. My brain was so confused, but my heart and stomach were pleased.

Enjoy this simple recipe for grain-free “oatmeal.”

I won’t tell if you lick the bowl clean.

IMG_6905

  • Servings: 1
  • Difficulty: easy
  • Print

IMG_6905

Ingredients:

1 cup riced cauliflower
1 banana
1 tsp coconut oil or ghee (not AIP)
3/4 tsp cinnamon
1/3 cup coconut milk
1 TB maple syrup
Pinch salt
Optional: 1 scoop collagen or other protein powder

Directions:

  1. Heat coconut oil or ghee on medium heat. When it’s melted, add riced cauliflower and sauté until it starts to soften, about 2 minutes.
  2. Add banana and use a wooden spoon to mash and combine it with cauliflower rice (about 1-2 minutes)
  3. When banana and cauli rice are well-incorporated, add coconut milk and bring to a simmer (about 2 minutes).
  4. Add the rest of the ingredients and stir well to combine.
  5. Allow to thicken for 1-2 minutes then turn off the heat.
  6. Transfer to a bowl or mug, add additional toppings if desired, and enjoy!

Notes:
-I used frozen riced cauliflower, but you can use fresh.
-Easily multiply this recipe as needed to feed more than one person.
-Feel free to sub maple syrup for honey, but I prefer maple syrup because the warm flavor makes it feel more like oats to me.
-Get creative with toppings! Sauté a chopped apple for apple cinnamon oats, add berries or other fruit, or add nut butters (not AIP).

Posted in AIP, Autoimmune Protocol, Food, Healthy, Paleo, Recipes, vegan | Tagged , , , , , , , , , , , , , , , , , , , , | Leave a comment